Periodically, you should ensure that changes done by others get
incorporated in your local working copy. The process of
getting changes from the server to your local copy is
known as updating. Updating may be done on
single files, a set of selected files, or recursively on
entire directory hierarchies. To update, select the files
and/or directories you want, right click and select
→
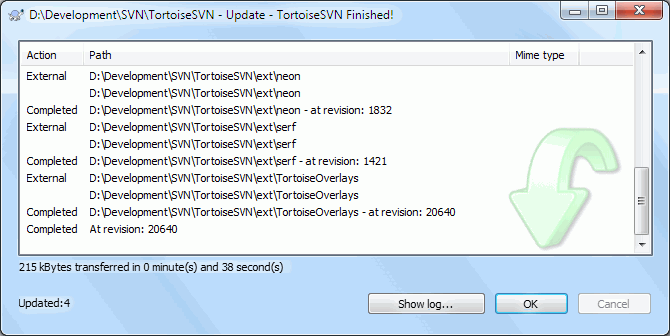
in the explorer context menu. A window will pop up displaying the
progress of the update as it runs.
Changes done by others will be merged into your files,
keeping any changes you may have done to the same files.
The repository is not affected by an update.
The progress dialog uses colour coding to highlight different update actions
- Purple
New item added to your WC.
- Dark red
Redundant item deleted from your WC, or missing item replaced in your WC.
- Green
Changes from repository successfully merged with your local changes.
- Bright red
Changes from repository merged with local changes, resulting in conflicts which you need to resolve.
- Black
Unchanged item in your WC updated with newer version from the repository.
This is the default colour scheme, but you can customise those colours using the settings dialog. Read the section called “TortoiseSVN Colour Settings” for more information.
If you get any conflicts during an update (this can happen if others changed the same lines in the same file as you did and those changes don't match) then the dialog shows those conflicts in red. You can double click on these lines to start the external merge tool to resolve the conflicts.
When the update is complete, the progress dialog shows a summary of the number of items updated, added, removed, conflicted, etc. below the file list. This summary information can be copied to the clipboard using Ctrl+C.
The standard Update command has no options and just updates your working copy to the HEAD revision of the repository, which is the most common use case. If you want more control over the update process, you should use → instead. This allows you to update your working copy to a specific revision, not only to the most recent one. Suppose your working copy is at revision 100, but you want it to reflect the state which it had in revision 50 - then simply update to revision 50.
In the same dialog you can also choose the depth
at which to update the current folder. The terms used are described
in the section called “Checkout Depth”. The default depth is
Working copy, which preserves the existing depth setting.
You can also set the depth sticky which means
subsequent updates will use that new depth, i.e. that depth is then
used as the default depth.
To make it easier to include or exclude specific items from the checkout click the button. This opens a new dialog where you can check all items you want in your working copy and uncheck all the items you don't want.
You can also choose whether to ignore any external projects in the update
(i.e. projects referenced using svn:externals).
Caution
If you update a file or folder to a specific revision, you should not make changes to those files. You will get “out of date” error messages when you try to commit them! If you want to undo changes to a file and start afresh from an earlier revision, you can rollback to a previous revision from the revision log dialog. Take a look at the section called “Roll back (Undo) revisions in the repository” for further instructions, and alternative methods.
can occasionally be useful to see what your project looked like at some earlier point in its history. But in general, updating individual files to an earlier revision is not a good idea as it leaves your working copy in an inconsistent state. If the file you are updating has changed name, you may even find that the file just disappears from your working copy because no file of that name existed in the earlier revision. You should also note that the item will show a normal green overlay, so it is indistinguishable from files which are up-to-date.
If you simply want a local copy of an old version of a file it is better to use the → command from the log dialog for that file.
Multiple Files/Folders
If you select multiple files and folders in the explorer and then select , all of those files/folders are updated one by one. TortoiseSVN makes sure that all files/folders which are from the same repository are updated to the exact same revision! Even if between those updates another commit occurred.
